All posts by Krystle Dunn

I am a teacher at Elsik Ninth Grade Center in Alief Independent School District. I have been teaching biology for 6 years.

What’s in your water?

Since here at NEWT we are all working on water projects. I have started to wonder about the water we drink and I asked my mentor what type of water he drinks and if he has ever tested his water at home to see what’s in it. He said at his place he drinks from the tap. He said he has a filter, but it takes too long. I find it interesting that most of us don’t worry about our water supply, but I know a lot of people who won’t drink tap water. There is a hesitation about what’s really in the water and it is perceived as not truly being pure. I believe situation like lead found in Flint, Michigan and even chromium-6 found here in Houston’s water supply in Alief doesn’t help. 

This week we were able to go on a field trip to get a glimpse of how the City of Houston provides it residence with drinking water.

Map showing the 3 water treatment plants and locations they serve.

We learned there are 3 purification plants in the city and we were at the largest. They are able to produce 80 million gallons a day and after an expansion they will attempt to produce 400 million gallons a day!

Diagram of the treatment of water before it enters our tap.
Scavenger hunt in the education center of water purification center

We were able to complete a scavenger hunt and an activity covering the water cycle. We were also given free samples!

Free water samples at Water Treatment Center

I was also able to visit the Buffalo Bayou Cistern.

Carlos Cruz-Diez at the Cistern: Spatial Chromointerference art instillation at the Buffalo Bayou Cistern

“The Buffalo Bayou Park Cistern is a former drinking water reservoir built in 1926 for the City of Houston. As one of the city’s early underground reservoirs, it supported the municipal water system’s goals of fire suppression (water pressure) and drinking water storage. After operating for decades, an irreparable leak was discovered and after a few years, the reservoir was decommissioned in 2007.” So if you lived or visited Houston prior to 2007, you probably had water that was stored in this facility.  Information about Buffalo Bayou

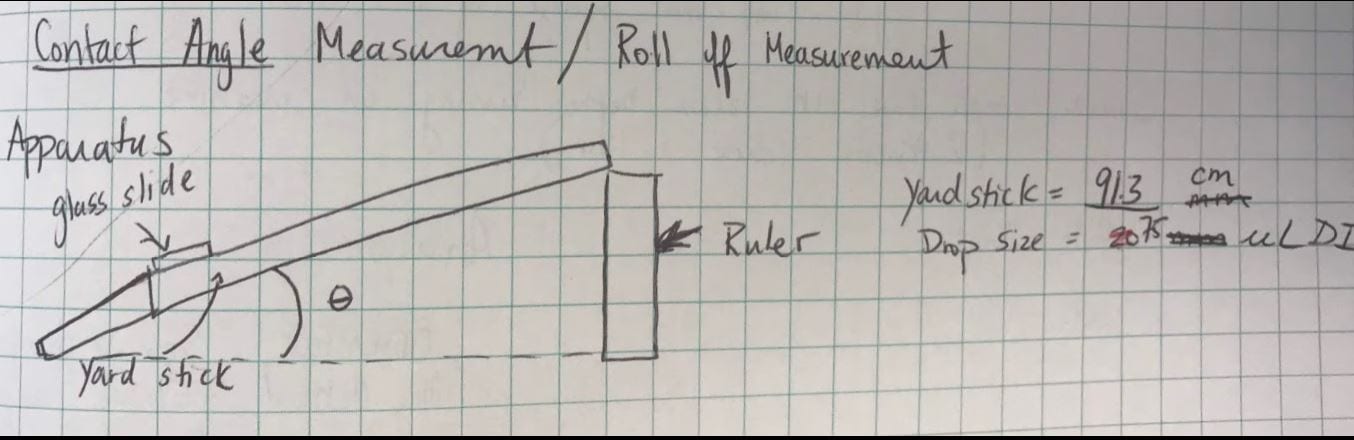
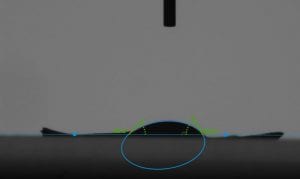
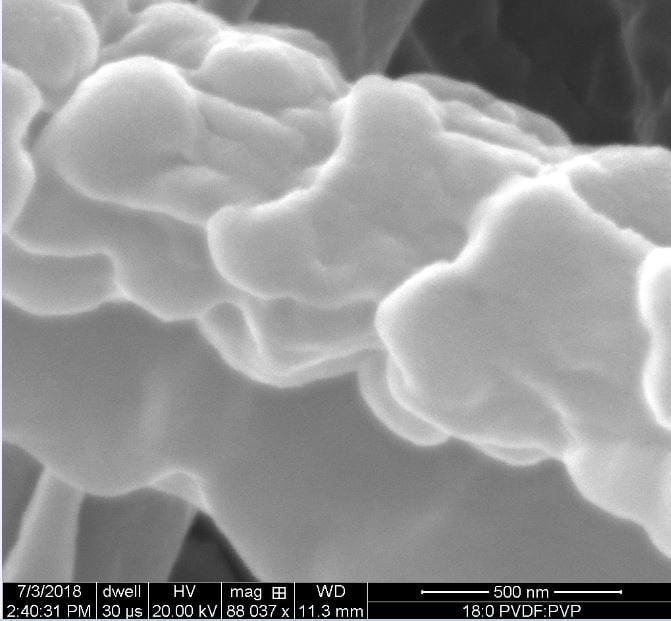
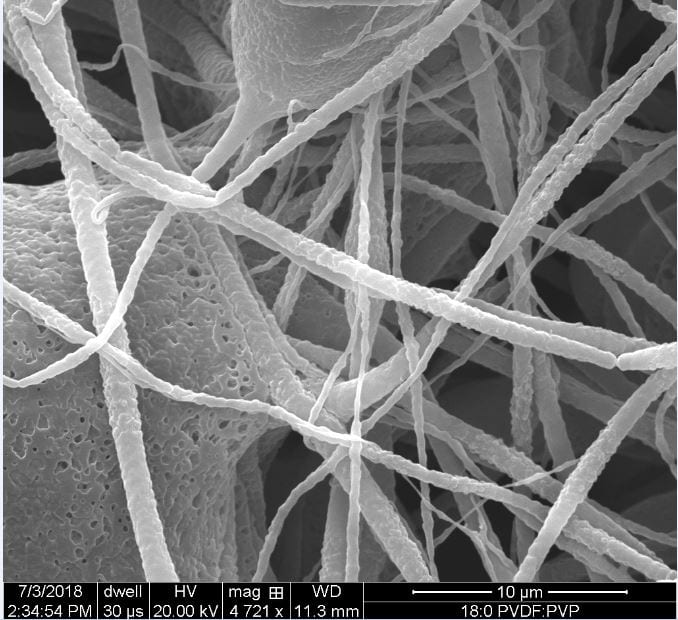
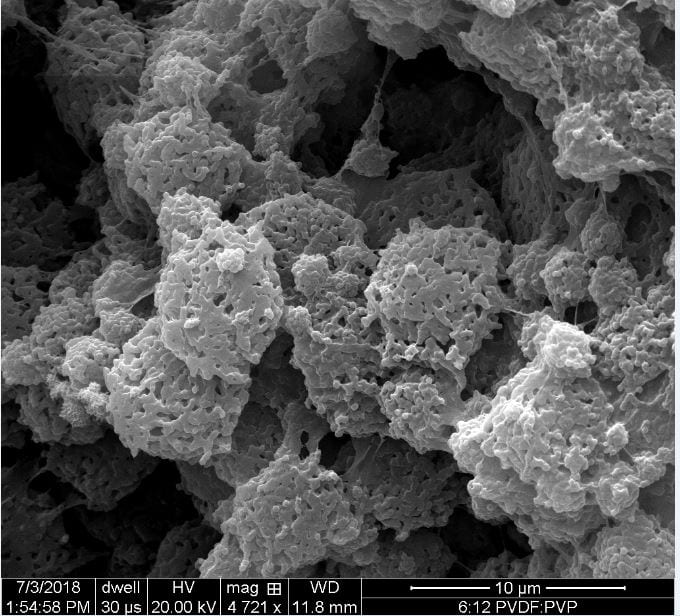
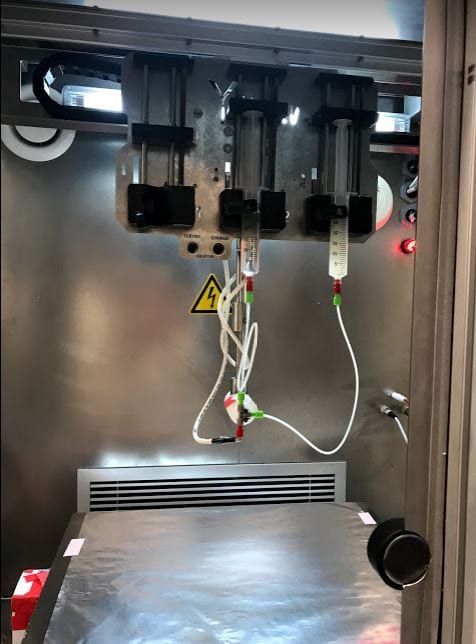
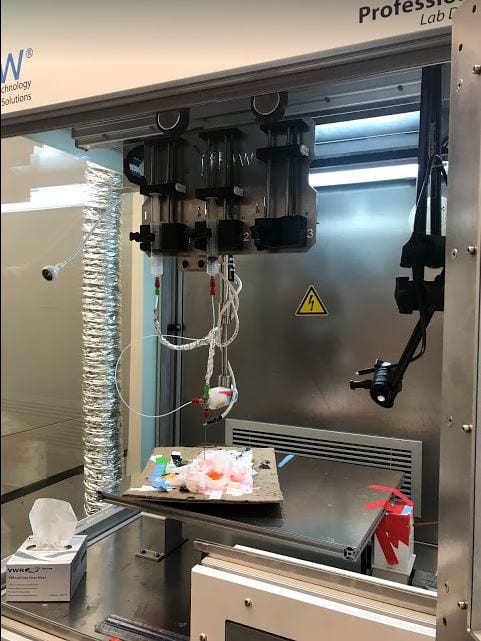
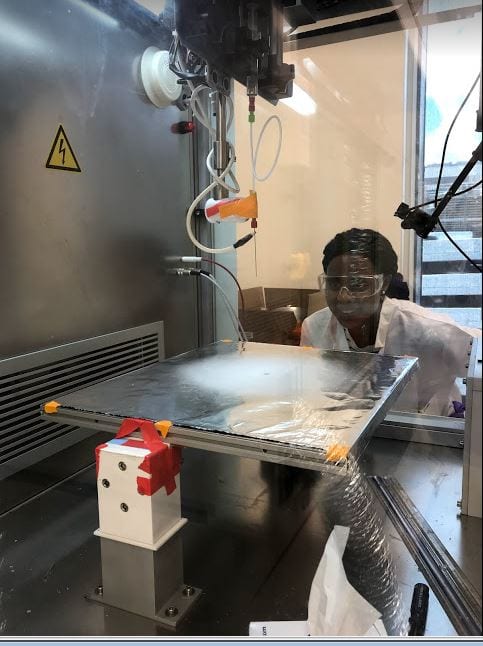
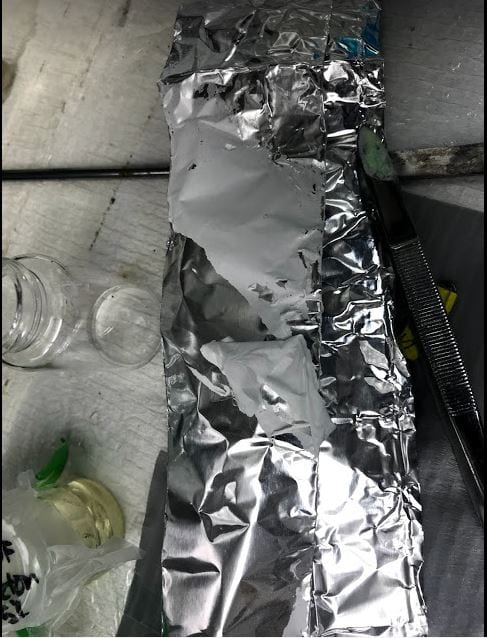
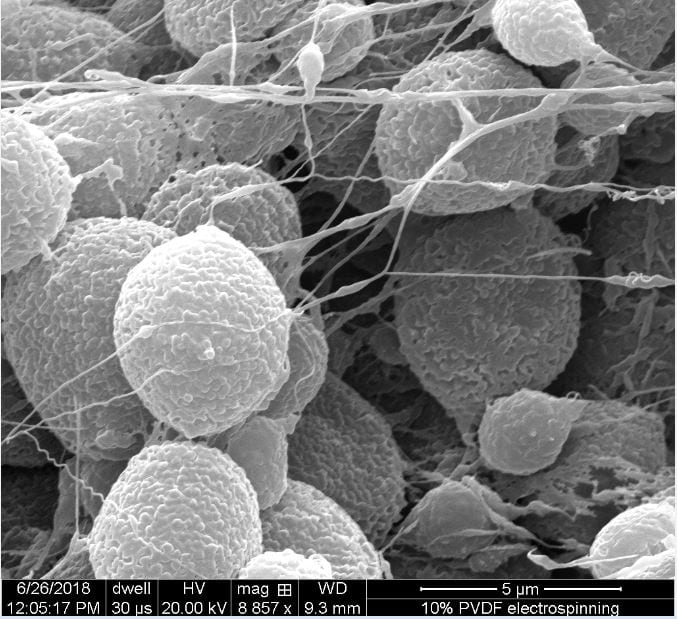
This week I was also able to run tests on my final membrane. We continued to test the contact angle and so far we have hydrophobic membrane, but it is not quite superhydrophobic. Next week, we plan to complete our journey to superhydrophobicity by adding silver nanoparticles and coating it with chemical to lower surface energy.

Make sure you all answer my question about what is in your water or what type of water you drink in comment section.

Currently, I use the tap for cooking and all of my other water needs, but I drink bottled or filtered tap water. Where does your water come from? What kind do you drink? Tap, Filtered Tap, Bottled, Purified, Spring?

Creating Superhydrophobic Membranes

Howdy!

This week was pretty interesting because I was able to see all of the electrospun fibers we created last week with using the scanning electron microscope (SEM). I was also able to practice  my students will use to measure the contact angle of a drop of water on an object to test its level of hydrophobicity.

If you recall from my earlier blogs, we want to create membrane that is superhydrophobic. According to all of the background research, superhydrophobic surfaces have a a high water contact angle above 150° and a low water roll off angle below 10°.

I didn’t take a picture of our set up, so I’ll explain it. It’s something that can be modified easily and done in class. We taped a glass slide to a yard stick and then mounted our membrane sample with double sided tape. We then dropped 75µL of water on the membrane. Next, we very slowly raised our meter stick against the wall . We measured the height we raised the ruler up the wall when the drop of water rolled off the sample. We used trigonometry to figure out the roll off angel, but if you have protractors you could have your students measure the angle directly. Here is our set up to test roll off angle.

Diagram of our apparatus to test the roll off angle
A drop of water on our 6:12 PVDF: PVP membrane sample

RollOffTest-1g7ae0t

After testing roll off angle, we were able to use the drop shape analyzer, which allowed us to take a precise measurement of the contact angle between a drop of water and our membrane. Here you can really see the different wetting properties of the two membranes.

Contact angle of 136° on PVDF:PVP in a 6:12 ratio
Contact angle of 43° and 59° on PVDF:PVP in a 9:9 ratio

This is also something I can do with my students. I would have them take a picture of their drop of water and then after uploading it into an image editor they can  measure and label their contact angles.

Next, we took our samples to the SEM to look at the surface morphology.

Rough texture on the membrane fibers will make the membrane hydrophobic
Image of 18:0 PVDF:PVP showing texture on fibers and some beads with texture
6:12 PVDF:PVP showing beads with pores
Uniform beads throughout 6:12 PVDF:PVP membrane


Overall our our membrane with only PVDF and our membrane with 6:12 PVDF: PVP had the highest contact angle. The PVDF only membrane had no roll off angle and the drop of water adhered to the membrane, but the 6:12 had our lowest roll off data.

Based on our data, we decided to blend our best membranes. We will spin fibers that have 18:0 PVDF:PVP inner core and an 6:12 PVDF:PVP outer shell.

Our current electrospinning setup with two solutions


Next steps include adding silver nanoparticles to the membrane to add roughness and then coating the membrane with a chemical to lower the surface energy. So I will update you then.

Until next time…


Week 3, PVDF Fabrications and Lesson Planning

I feel like I am getting the hang of being in the lab. I have been able to do almost everything on my own with my mentors close guidance. This week we were able to make the membranes with varying concentrations of PVDF and PVP.

Monday- We were trained on how to use the Yflow Electirospinner in the BRC here at Rice.This is a fancy machine that automates many of the variables of electrospinning.

Y Spinner located in the BRC at Rice

It also gives us the  option to use special needles attached to our syringes. This will allow us to spin 2 solutions at a time and create a inner core and outer covering with different pore sizes.

Watching the tiny fibers collect on a piece of foil paper

Tuesday-I was able to go through the process of sputtering ( spraying a thin layer of gold) on our electrospun membrane and using the Scanning Electron Microscope (SEM).

A piece of the completed membrane
SEM image of 10% PDVF with out any PVP

Wednesday- I had some awesome visitors come by and I was able to show them my work space. Then, I was able to mix our first polymer solution and we brought it over to the BRC later in the afternoon and created our first membrane.

Thursday- We were able to get a glimpse of projects being completed in the nanotechnology RET program. Their projects all deal with nanotechnology, but not water treatment. I was able to see a lot bioengineering applications of nanotechnology. Later, I was able to electrospin our second membrane. My mentor, Seth, spun the fourth membrane.

Friday- We mixed our last solution and spun our last membrane. We will compare the surface structures of each by using the SEM next week.

This week I have also had a lot of time to think about my lesson. As I  wrote my script and continued to think about what we are trying to achieve in the lab, I thought about how I could have my students model our approach.

Originally, I wanted my students to discover the hydrophobicity of different items (metal, wood, cardboard, and plant leaf)  by observing the contact angle of a drop of water and then measuring the tilt angle at which a drop of water would roll of the material. I would then allow them to choose different items to modify their surfaces such as petroleum jelly, oils, detergents, “magic sand”. Then I would dirty  (apply salt or pepper) to their surfaces. Then we would test their designs by pouring water over them to see who’s surface is the cleanest.

After learning more about our porous membranes, I believe I could also have the students create a macro scale version of the nano scale membrane. I am thinking I would give them each a flat piece of cardboard. This would be their membrane and they can modify the surface by cutting holes, adding bumps. The water could be modeled by marbles or small balls. They could then measure the number of pores, size of pores they created, and the tilt angle.

What do you guys think? Do you have any cell membrane, pore size, hydrophobic/hydrophilic labs that you currently do?

Trusting the Engineering Process

This week I learned how we will be fabricating our membrane. Last week, I described how we want a membrane that has hierarchical roughness. Which means it will have an inner core with pores and an outer core with even larger pores. Like this 

Image of large pores in a PVDF membrane

So the method we will be using is called electrospinning. It is a technique that can create fibers with diameters as small as a few nanometers. You can really see how small the fibers are in comparison to a human hair below.

Scanning electron microscope (SEM) image of a human hair surrounded by electrospun fibers of poly(vinyl alcohol) (PVA)

To gain an understanding of the process I read a review article about all the possibilities of electrospinning which include optoelectronics, sensor technology, catalysis, filtration, and medicine.    Well the setup seems quite simple, but there are several variables that can be manipulated  to change  the product made.

A laboratory setup for an electrospinning experiment with a perpendicular arrangement of the electrodes. 
Our horizontal lab set up for electrospinning

There is not a protocol yet for what he wants to accomplish so we are meshing together the procedures from a few articles on electrospinning polyvinylidene flouride (PVDF) membranes. So my mentor and I set out on an engineering adventure with a scientific article in hand to attempt to bring his plan to life.

This is how I would sum it.

Step 1.

Create a solution of  whatever you want your fibers to be composed of. In our case it is a PVDF solution. We are using this polymer because of its resistance to harsh chemicals. It took 2 days just to prepare the solution! We will be testing several variables and the concentration of the PVDF solution is one those. We prepared a 15% and a 10% solution.

Step 2.

Place your polymer solution in a syringe that is placed in an automatic pump. Set up the electricity. We set our electric field at 20  kV or 20,000 volts. The applied voltage causes the solution to be pulled from the positive to negative electrode. As you increase the voltage the shape of the polymer will change from a cone to a jet and cause your product to change.

Step 3.

Start the pump and when you see the solution exiting the nozzle of your syringe turn on the electricity. Watch and wait for your fibers to collect. The spinning process took about 3 hours total for 3 ml of solution.

Like I said the process seems very simple, but is very complex due to all of the variables that can be manipulated. The distance the nozzle is from the collecting plate, the humidity, the rate of the pump, the size of the syringe, the electric field all play a major role in the fiber formation.

Next,  we will use the Scanning Electron Microscope (SEM) to take images of our membranes to compare the two solution fibers.

We will also be trained on a special elctrospinning set up that will allow us to take control of many of the variable mentioned before.

This week I have learned to importance of the doing background research because we have had to rely heavily on the work of others. I have also learned the importance of my engineering notebook. Everything we do is recorded in the notebook and will not only help us but serve as a guide to others.  This experience has given me a concrete experience, so I can better teach my students the engineering process.

Using nanotechnology to recycle water from urine

Howdy! My name is Krystle Dunn and I am completing the Nanotechnology-Enabled Water Treatment System (NEWT) Summer Research Experience for Teachers (RET) program. The vision of  NEWT is to ensure water access anywhere in the entire universe! The project that I am working on will help recycle water from astronaut urine, so that they have potable water for drinking, hygiene, and oxygen generation in space.

This week I feel like have been immersed in an intense 5 E Lesson Plan.  So far, I have been engaged by reading article to build knowledge and expectations, exploring and receiving explanations when shadowing and working with mentors.

This first week I have completed a lot of background research to just wrap my head around the concepts and the problem that we are trying to solve. In space membrane distillation is the method for treating concentrated urine, but membrane scaling and fouling is a problem. So, the membranes get dirty with minerals and bacteria and need to be replaced sooner than expected. I am working in the Qilin Li Lab and her lab focuses on creating many types of membranes for water purification and keeping those membranes clean.

My mentor, Seth Pedersen’s goals is to create a membrane with low surface energy and hierarchical roughness(increased surface area) that that will make the membrane superhydrophobic. They will look similar to the images below. 

The membranes we fabricate will look similar to these.

After the membrane is made we will coat it with silver nanoparticles  to increase the roughness and then coat it with 1-dodecanetiol which will make the membrane more hydrophobic. The idea is very similar to the nano waterproofing activity we completed during our RET orientation.

Here is a breakdown of my week. (Engage, Explore, and Explain)

Day 1-3

There are several undergrad, grad, and postdoc students that work in the Li lab.I was introduced to another project that is taking place in the Li lab while my mentor attended and presented at a conference on membranes. I was able to work with Suping Yu who specializes in inhibiting and understanding the growth of biofilms on membranes. She does this by cultivating the bacteria and then she compares the genetics of normal strain and antibiotic resistant bacteria.

Biofilm cultivation of bacteria without antibiotic treatment and antibiotic resistant bacteria with treatment

Day 4

I was able to use the scanning electron microscope (SEM) with Seth and get images of the commercial membranes that he is currently using.

An SEM image of a commercial PVDV nanofiber membrane with biofilm fouling

Day 5

I attended the labs group meeting and heard updates on other projects that are taking place in the lab. I attended a meeting to determine the best practices for collecting urine on campus. I also helped with the modifications of the module that houses the membrane during the Membrane Distillation experiment.

Modifying the module or membrane chamber for the membrane distillation setup

I look forward to the upcoming weeks (Elaborate and Evaluate)

We will be ordering parts and chemicals to create our membrane and be trained on electrospinning (the process we will use to create our unique membranes) and begin creating the membranes. I will also narrow down my options for a lesson plan to bring back to school.